 BANZ
Scenario 1: Getting started
On this page
About 10 minutes.
What you need
Get these ready before you start:
- A computer. macOS, Windows or Linux all work.
- An email address, to register and sign in.
- A sign-up code. Ask your admin for one, or request one at /apply/ on the website: https://emphar.com/apply/.
- An agent program installed on your computer (such as Claude Code or Codex) that you’ve signed in to once. If you don’t know how to install one, ask a colleague or your admin to set it up for you.
- An authenticator app on your phone is a good idea, since you’ll need it the first time you sign in. If you don’t have one, you can use an email code instead.
1. Install
Go to the release page https://service.emphar.com/releases/, download the installer for your computer, install it and open banz. On Windows, if you see “Windows protected your PC”, click “More info”, then “Run anyway”. On macOS, the first time you open it takes one extra step. Follow the “Install” section in the advanced docs linked at the end, or ask a colleague to install it for you.
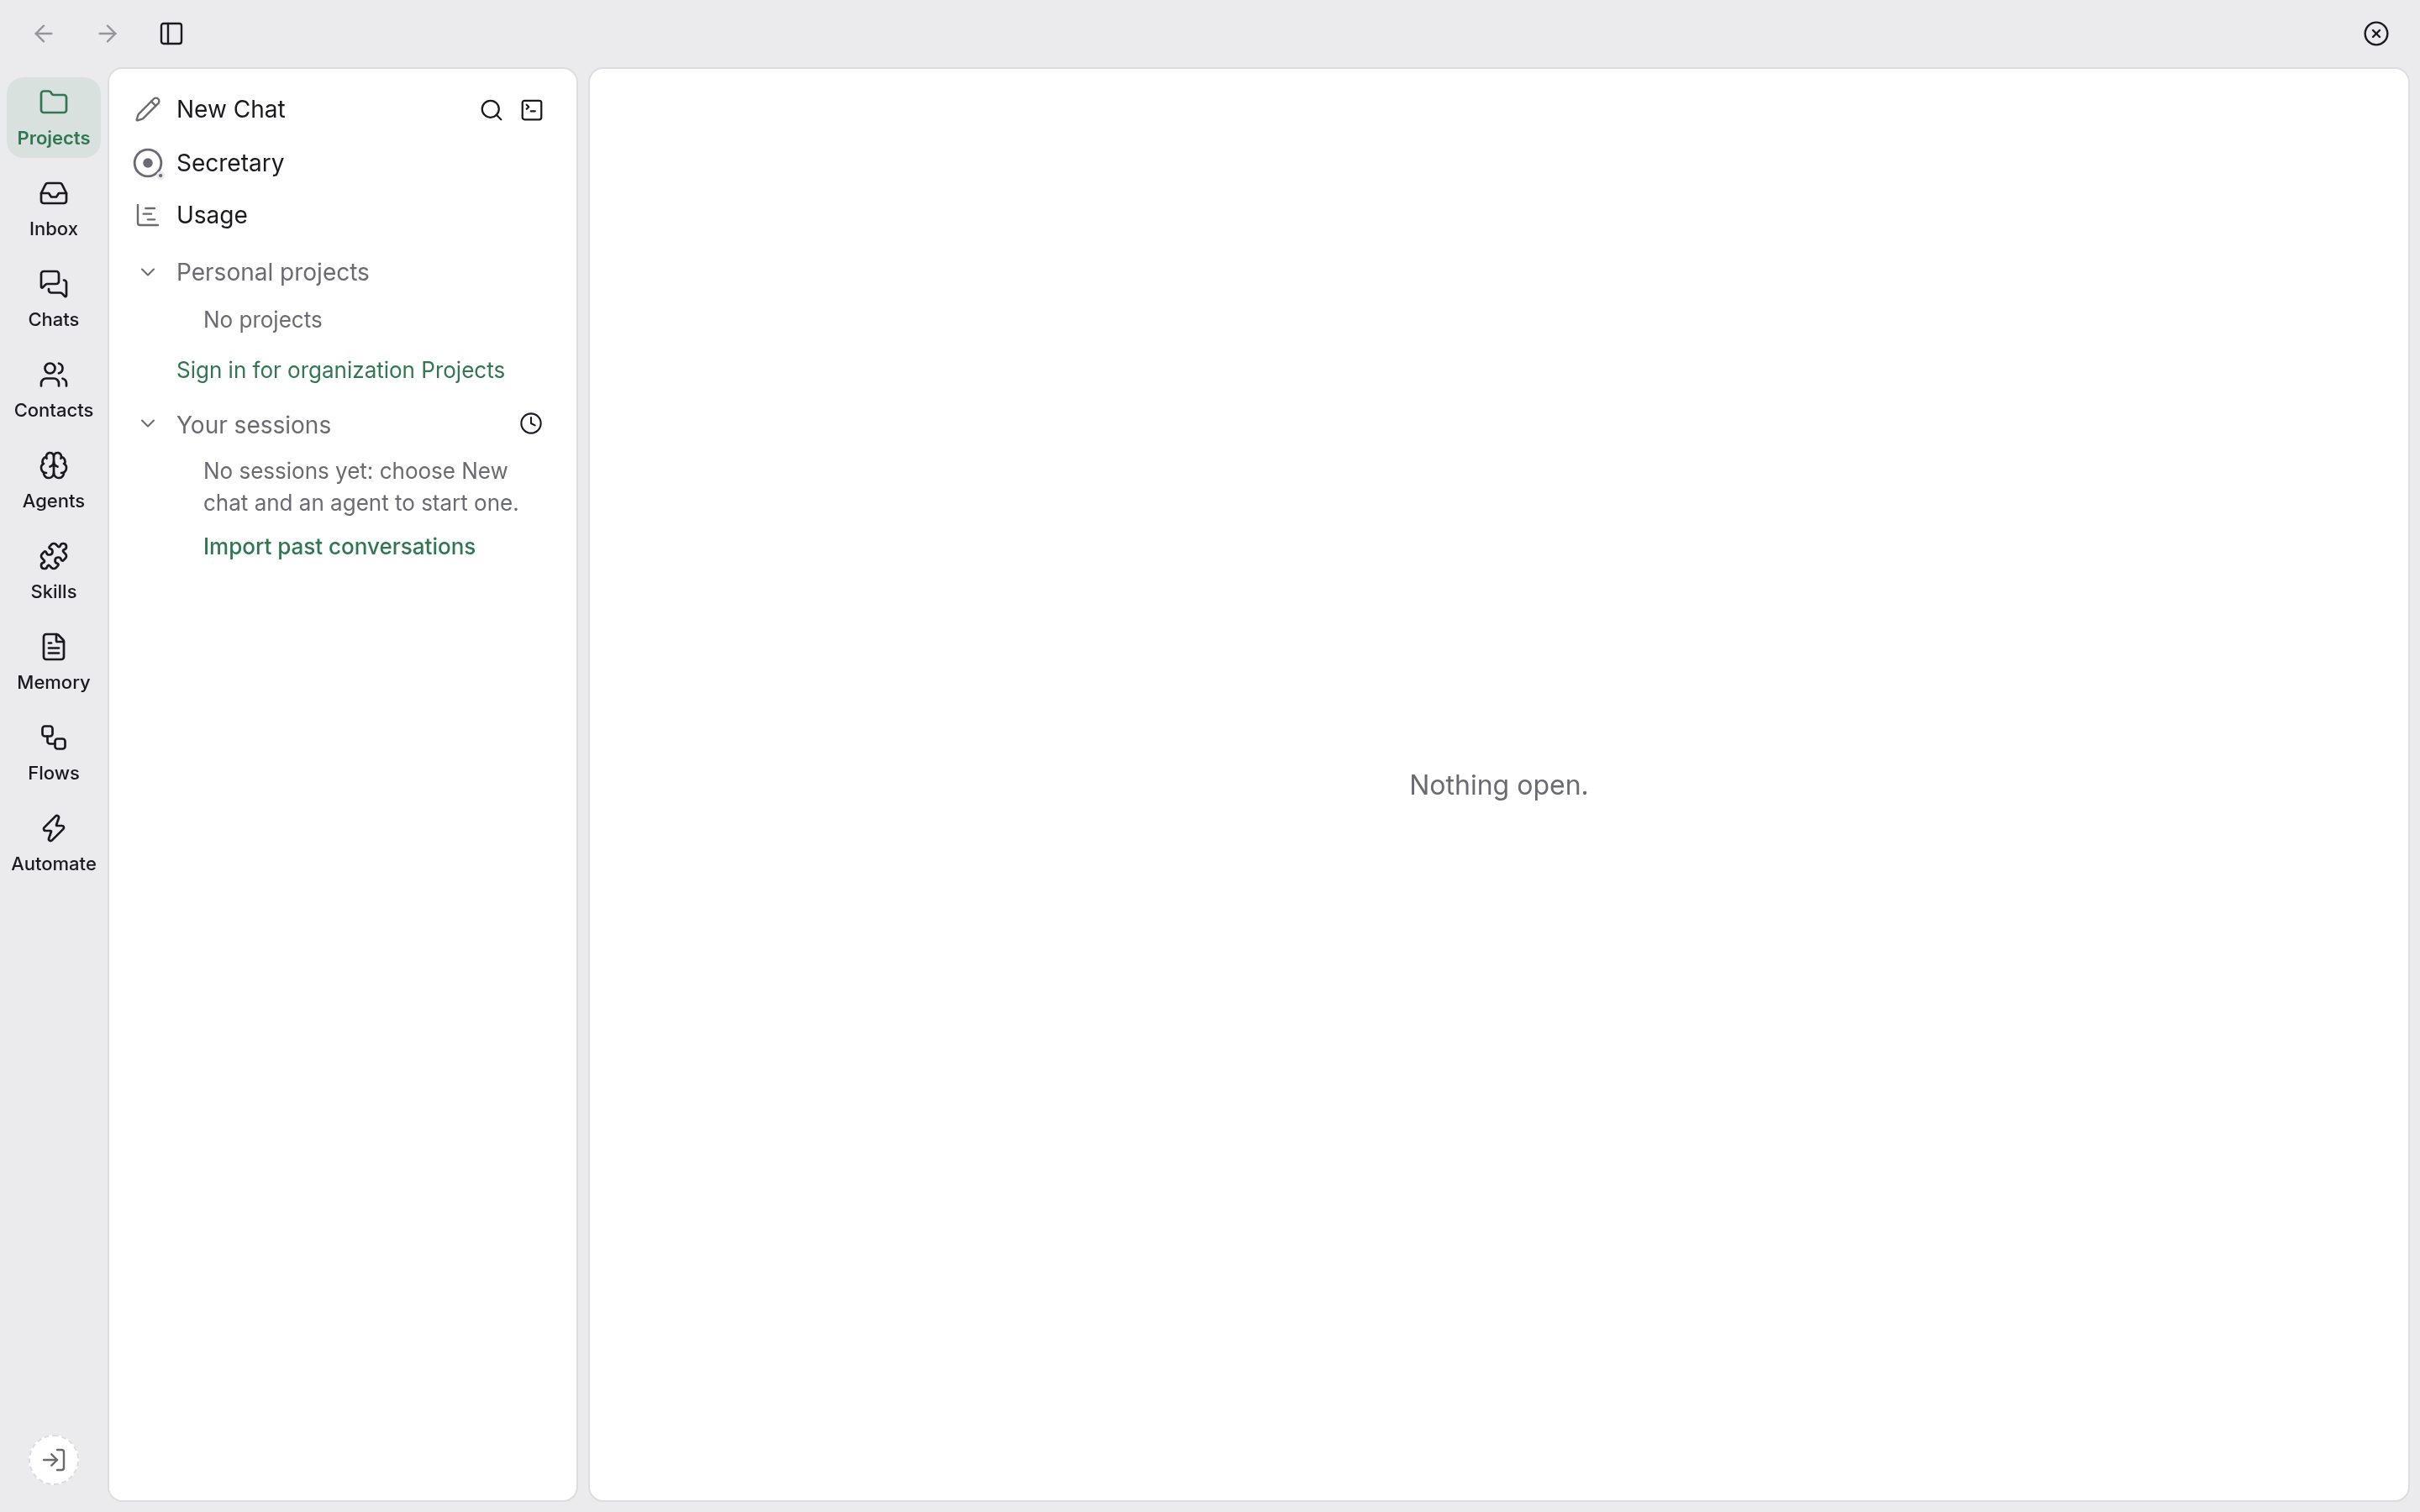
Once it opens, you’re looking at the workbench. The column of icons on the far left is the navigation rail, and there’s a sign-in icon in the bottom-left corner.
2. Register and sign in
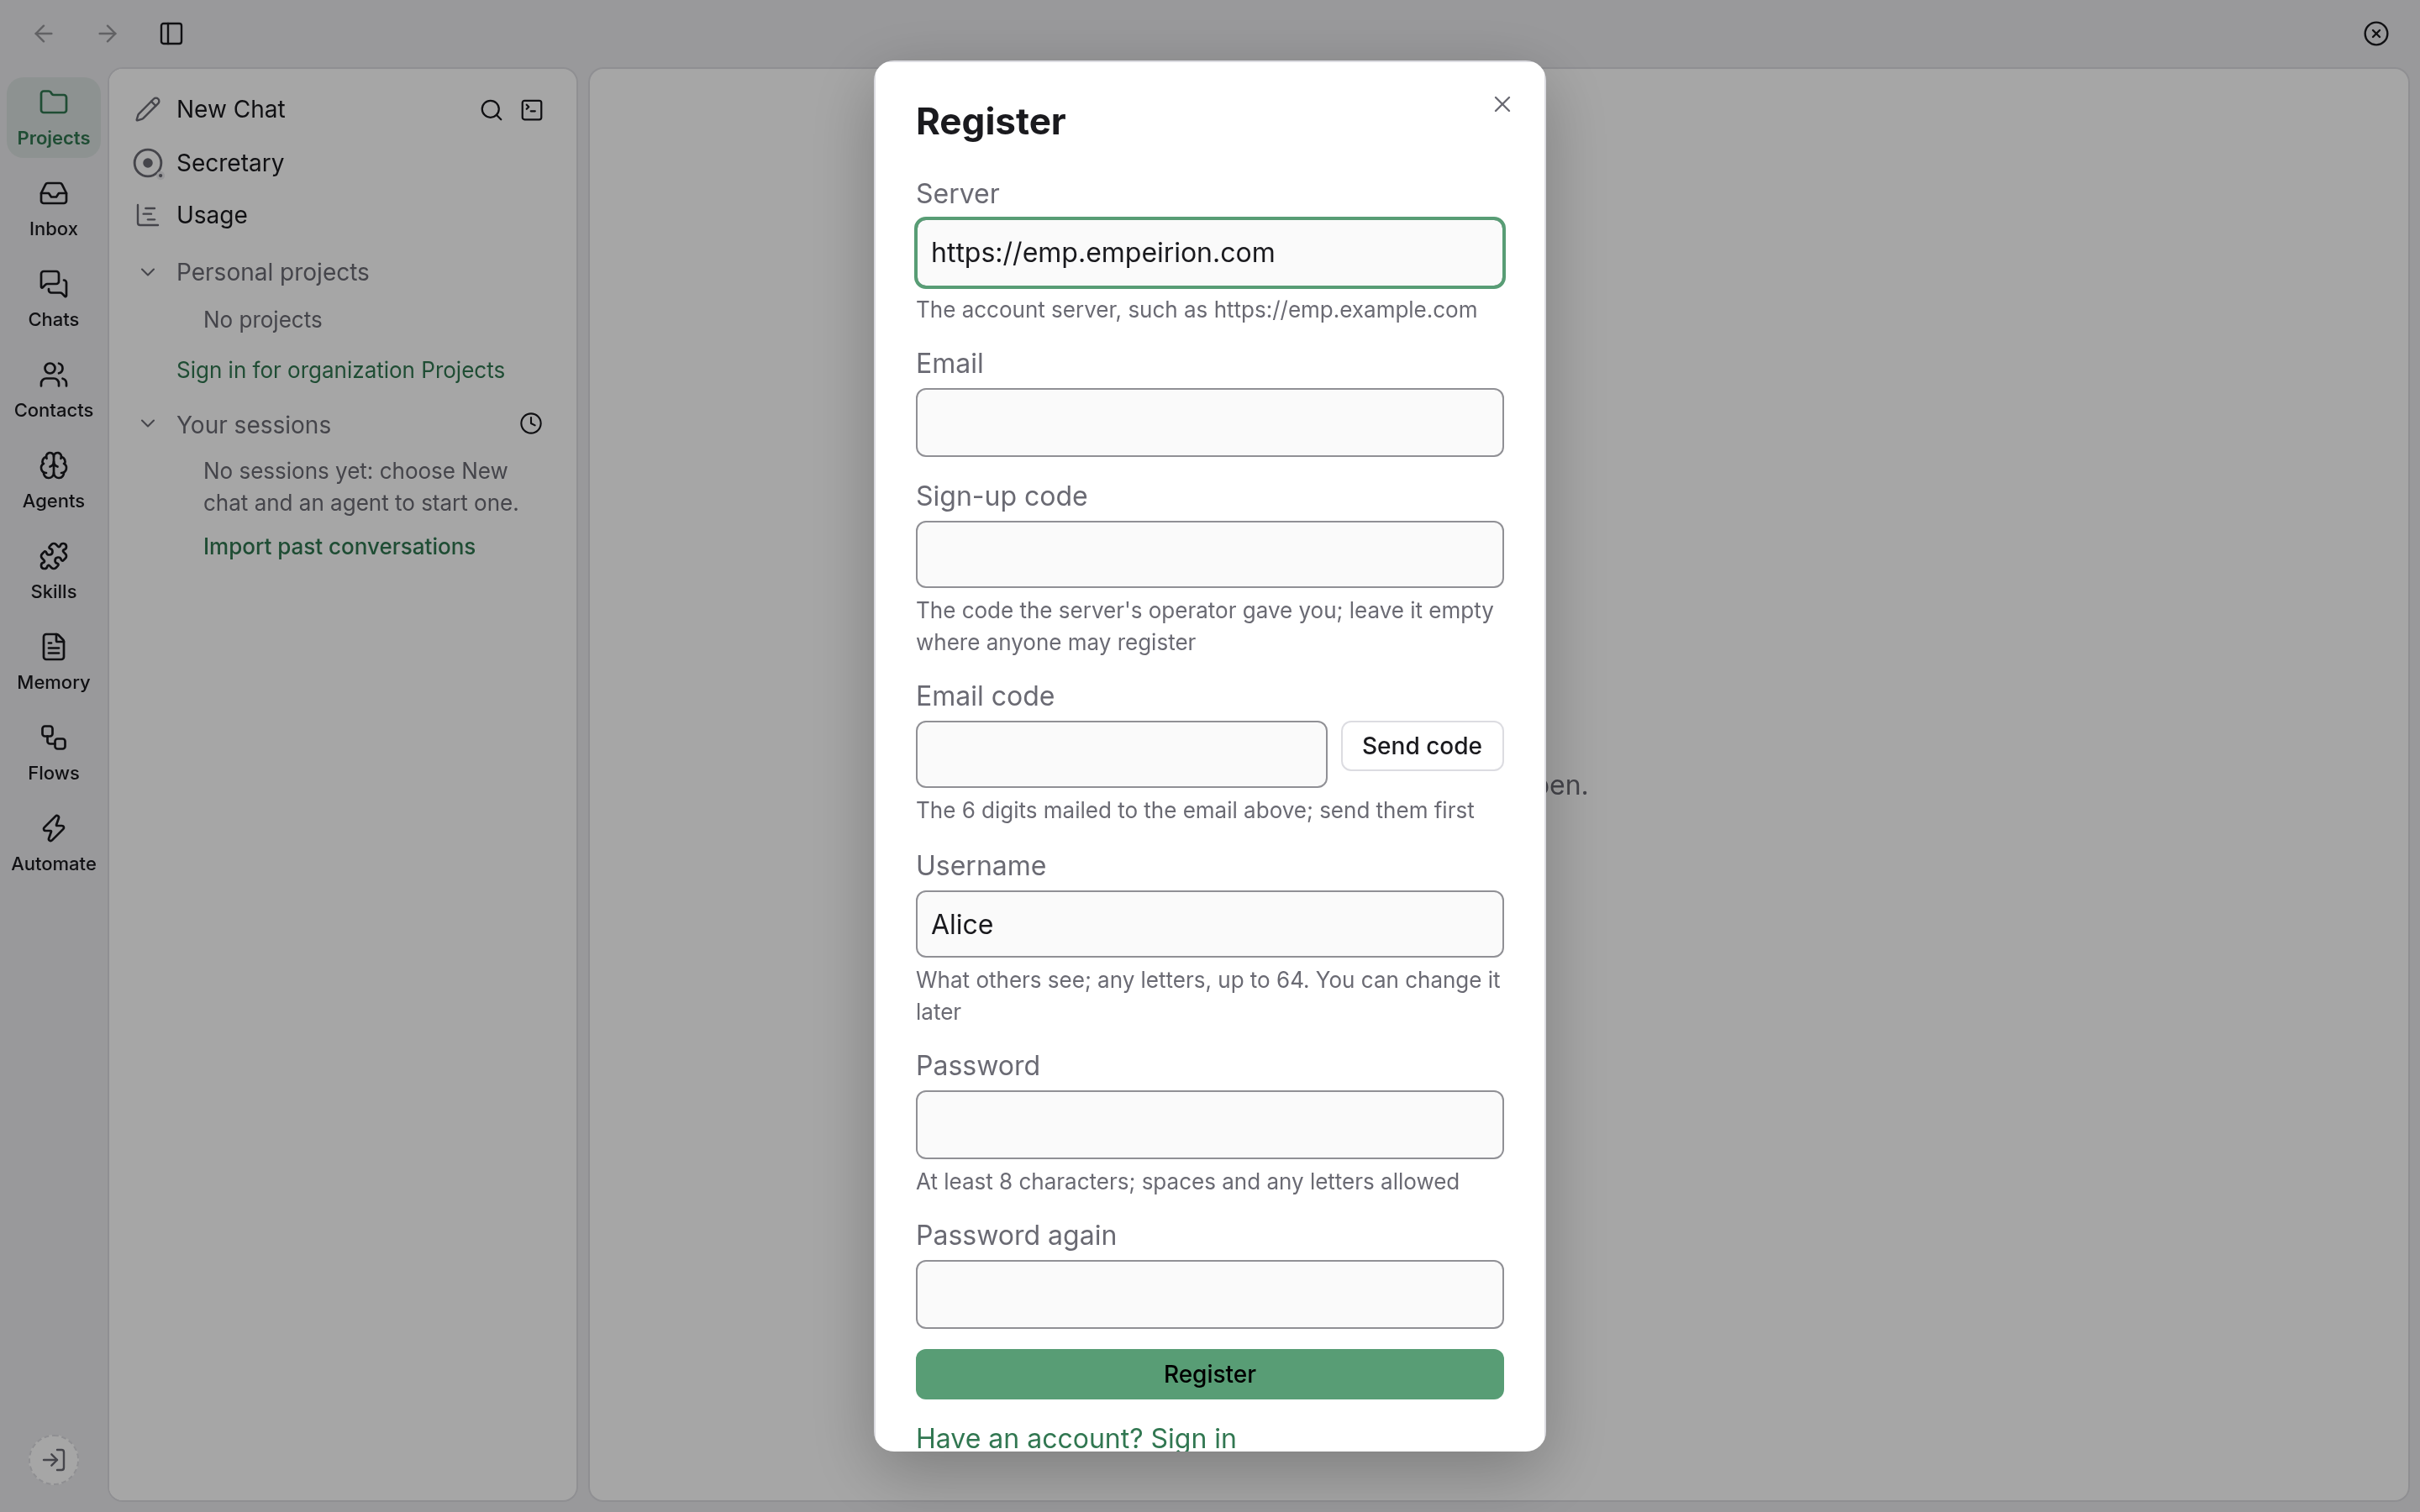
- Click the sign-in icon in the bottom-left corner and choose “Sign in”. The “Server” field is already filled in, so leave it alone.
- Click “No account yet? Register” at the bottom of the window.
- Fill in your email, the sign-up code, the email code (click “Send code” and type in the 6 digits from the email), a username (the name other people see, such as “Alice”) and a password, in that order.
- Click “Register”.
Next it asks you to set up two-step verification, which the app calls a “second factor”:
- Choose “Authenticator app (recommended)” and scan the QR code on the page with your phone.
- Type in the 6 digits your authenticator app shows and click “Continue”.
- The page shows 10 recovery codes, and only shows them this once. Click “Copy them”, save them somewhere safe, tick “I have saved them”, then click “Continue”.
Do keep the recovery codes safe. If you lose your phone, each recovery code can be used once in place of a verification code to sign in.
Once you’re signed in, the icon in the bottom-left corner turns into your avatar.
3. Start your first session
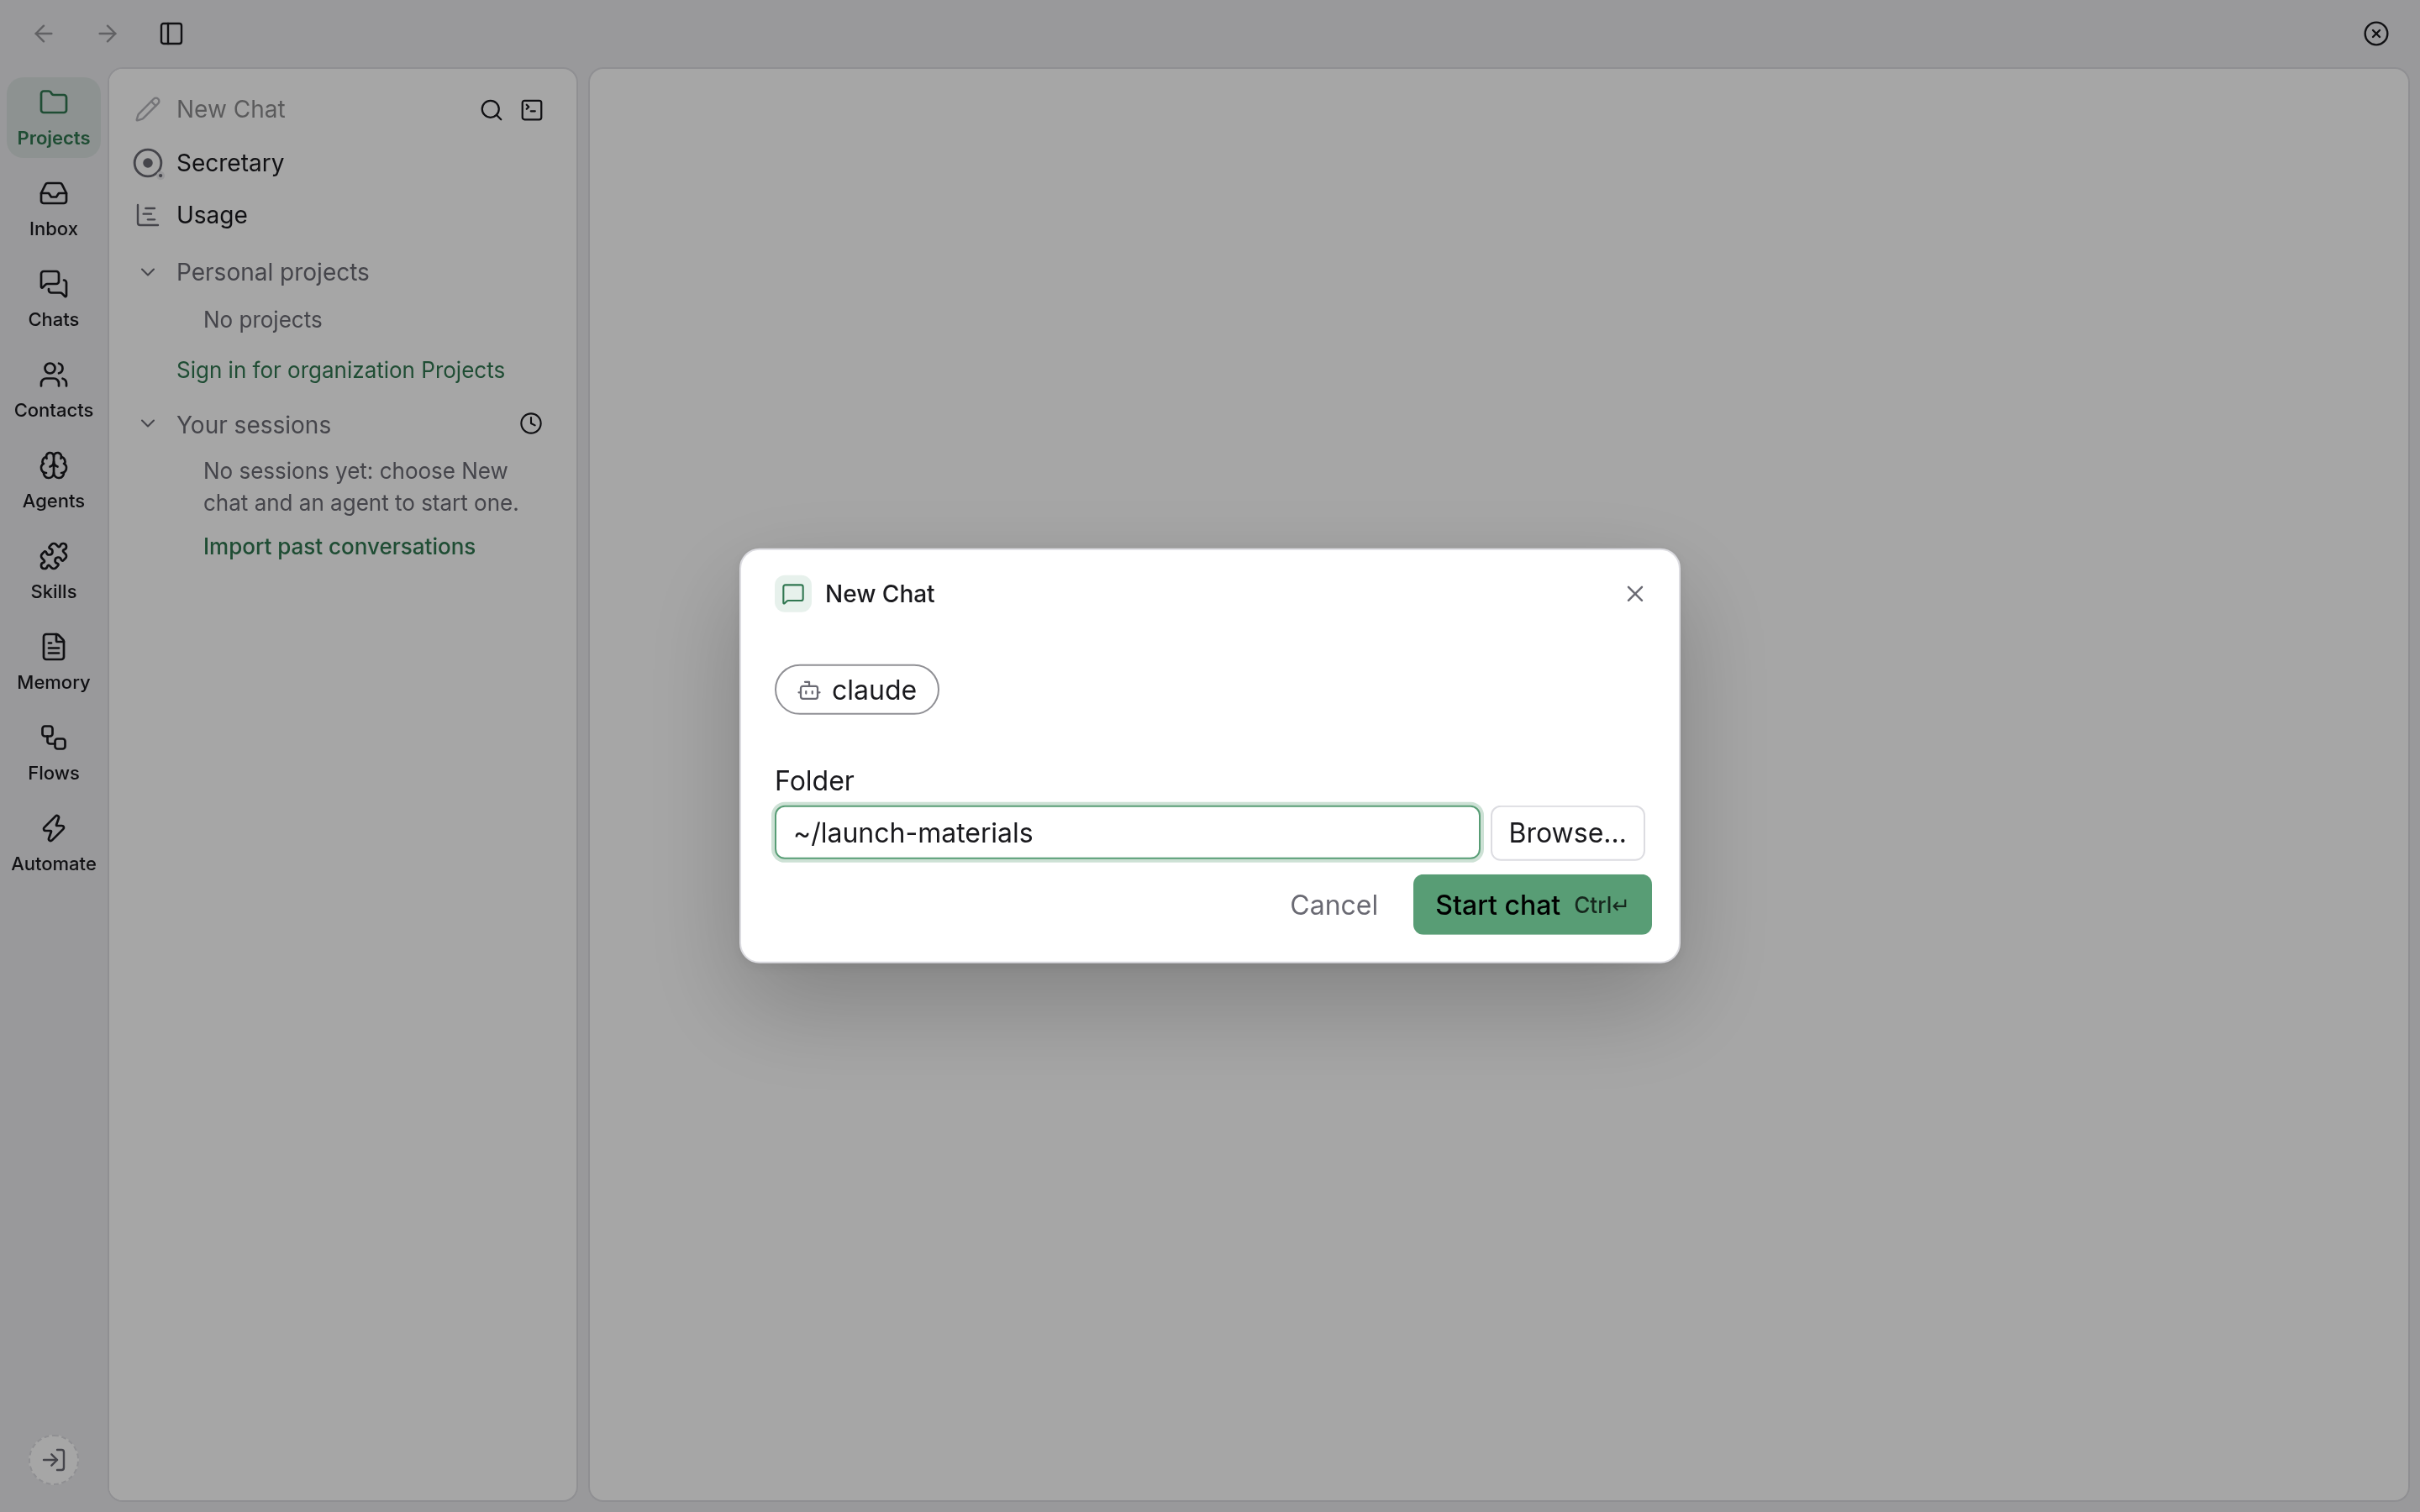
- Choose “Projects” in the navigation rail, then click the pencil icon “New Chat” at the top of the list.
- Choose a “Harness”. This is the agent program, such as Claude Code or Codex. Pick the one you installed; the ones you haven’t installed are grayed out, with the reason next to them.
- Choose a “Folder”. The agent starts working from here, and it should only touch files that belong to this piece of work. You can make a new folder first, such as “launch-materials”, put the related documents in it, and then choose it.
- Click “Start chat”.
banz sets up your first agent for you at the same time. By default it’s set to “Ask before acting”, so before it changes files or runs anything, it stops and asks you. It has the same name as the program, such as “claude”. If you want to rename it, click “Agents” in the navigation rail, open it, go to “Settings” and change the name, for example to “Copywriter”, then click “Save changes” at the bottom.
4. Send your first message
Type what you want done in the input box at the bottom of the session page. Press Enter to send and Shift+Enter for a new line. For example:
Look at what’s in this folder and tell me in three sentences.
Once the agent gets going, you’ll see:
- Its replies and each step it takes, in order in the conversation. Click a step to see the details.
- When it wants to do something, a card pops up, such as “claude asks to use Bash” (Bash means running commands on your computer), saying what it wants to do and why. Read the reason on the card. If it makes sense and it’s what you want, click “Allow”. If you click “Deny and continue”, it tries another way, and you can tell it in the input box how you’d like it done.
- To stop it, click the stop button to the right of the input box, or press
Esc.
To attach files, click the + in the bottom-left corner of the input box, or just paste the files in.
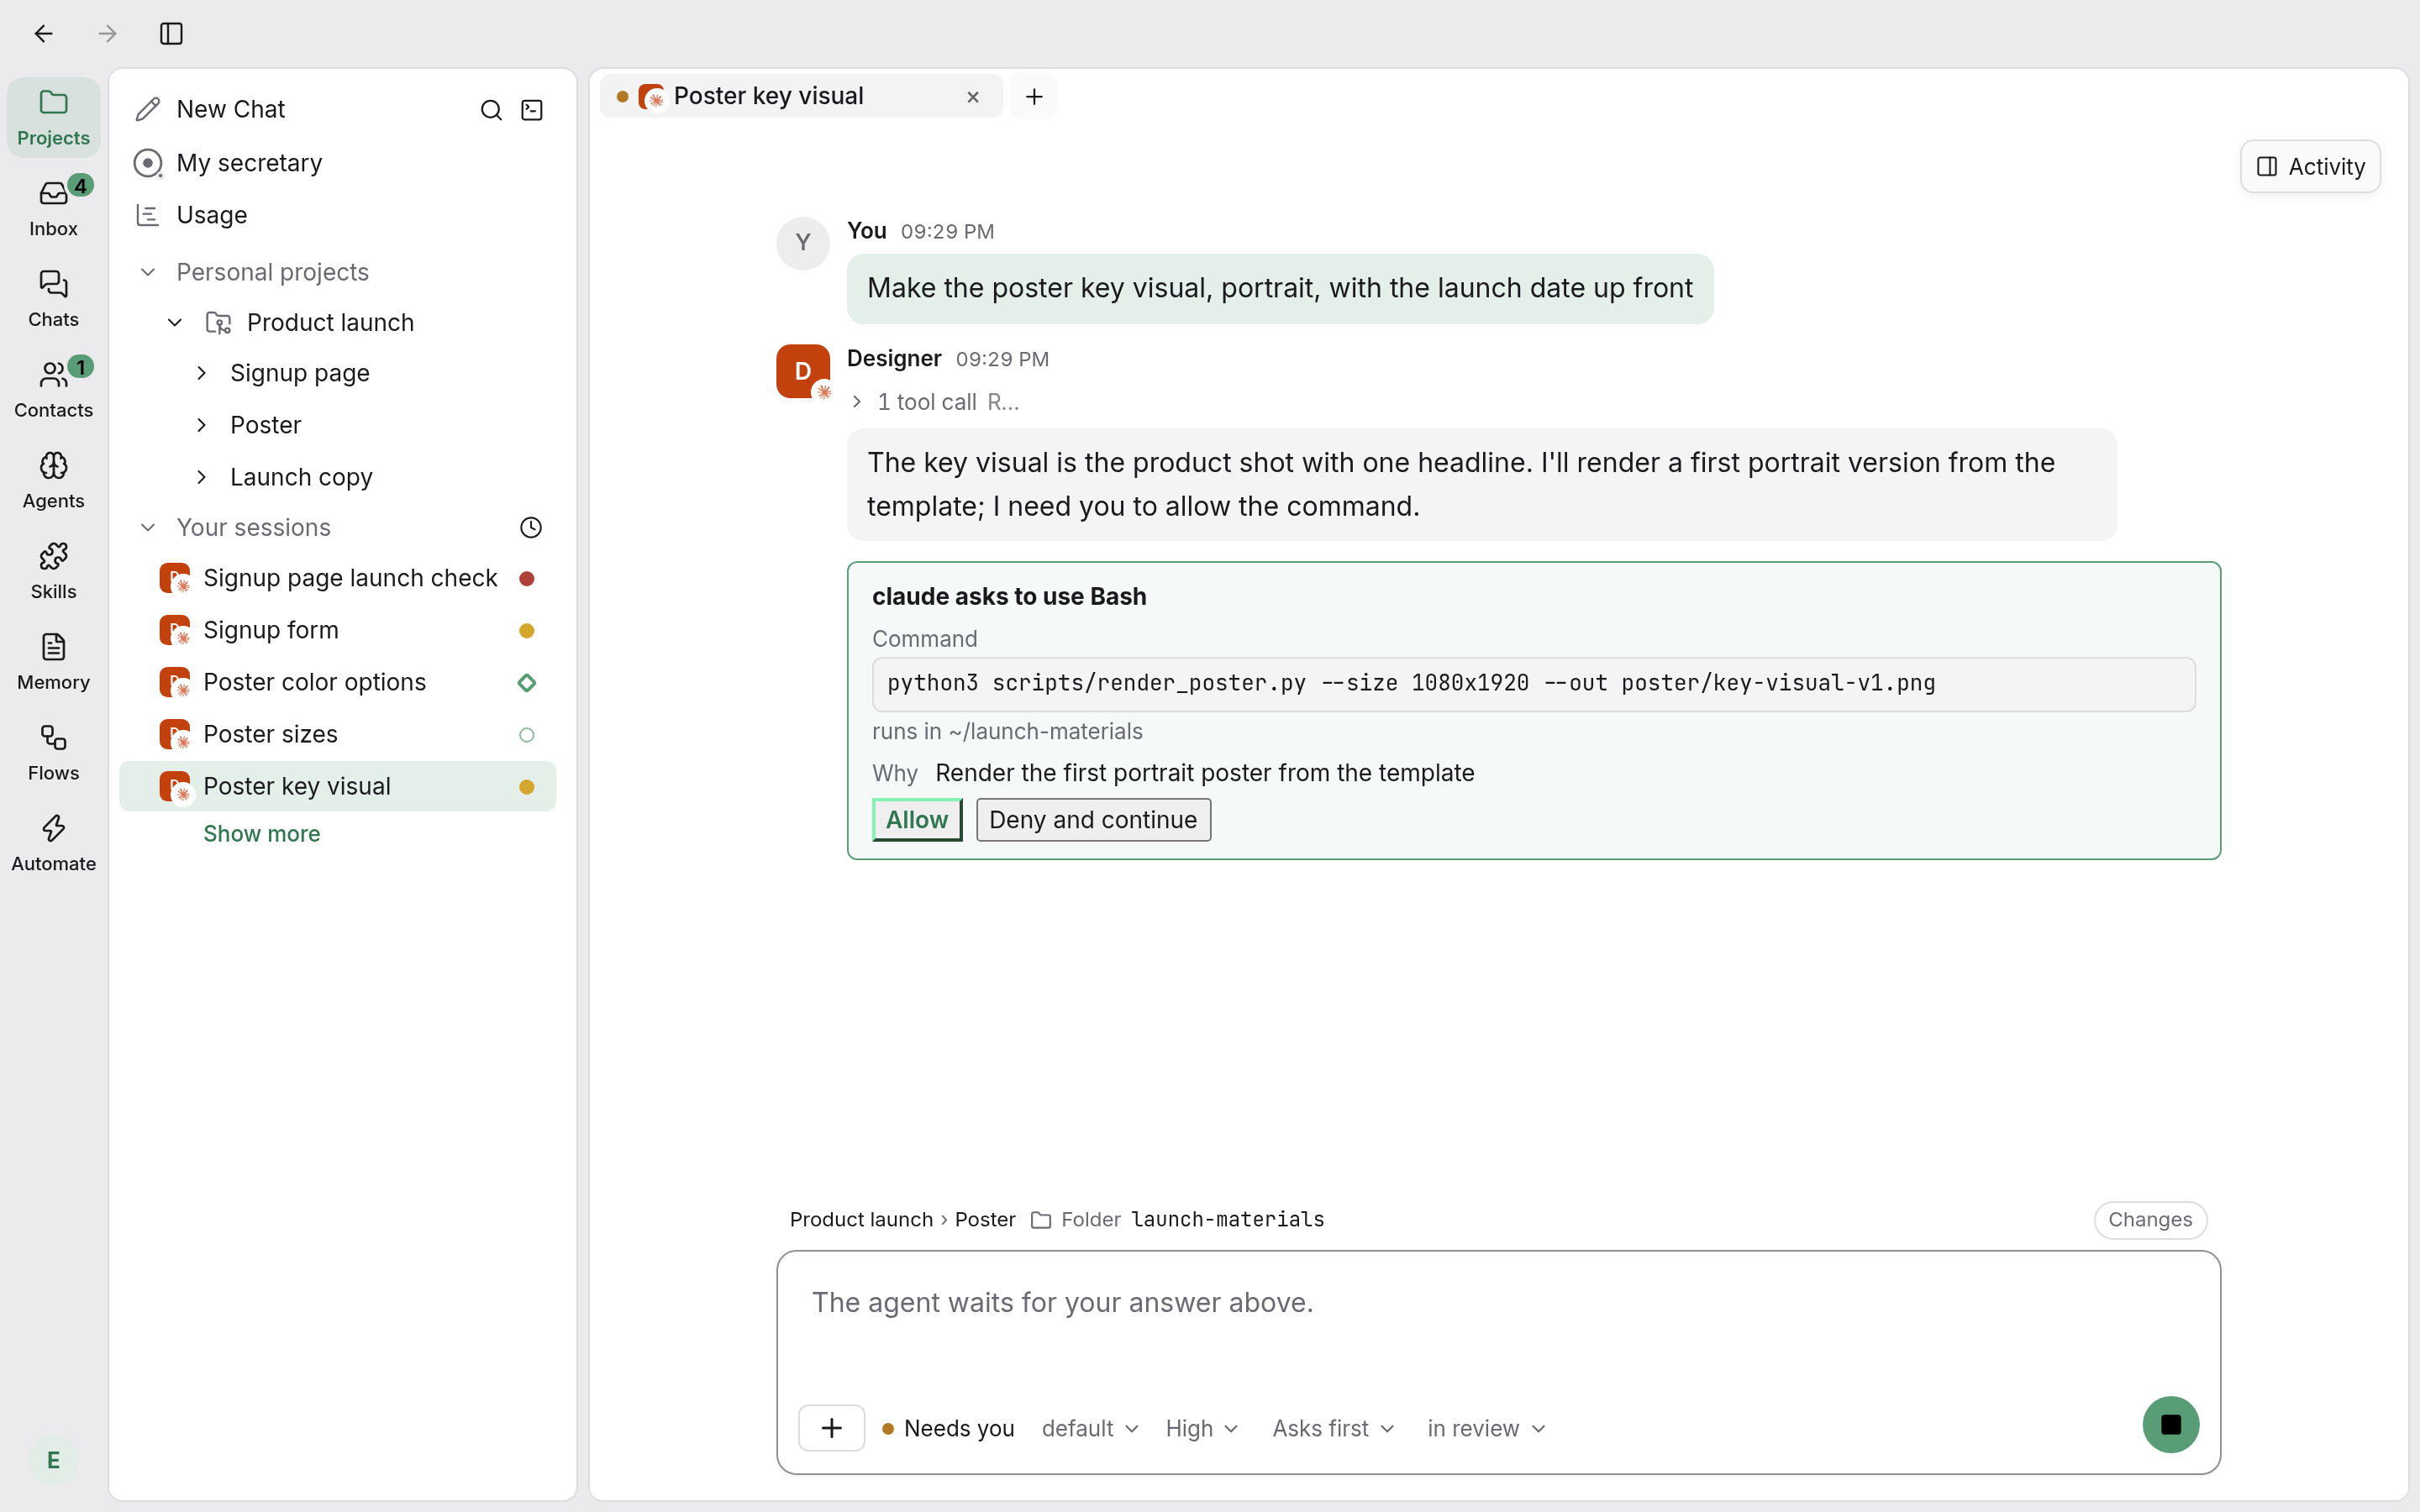
The session stays under “Your sessions” in the list. Closing the app won’t lose it, and you can open it any time to pick up where you left off.
You can also bring in conversations you had in Claude Code or Codex before. Click the clock icon “Import past conversations” to the right of the “Your sessions” heading, tick the ones you want, and click “Import N conversations”.